Two-Tier CA structure ( Online Subordinate CA )
Prerequisites
IIS must be installed and working from the clients that will need the RootCA or certs signed by the RootCA server. See more for a simple IIS install guide here: https://scito.dk/2023/08/15/install-iis-for-certificate-authority-crl-and-root-certificate-distribution/
RootCA must be present for signing the SubCA cert. Read more here: https://scito.dk/2023/08/15/two-tier-ca-structure-offline-rootca/
Steps
- Install Windows Server
- Fully Update Server
- Create C:\Windows\CAPolicy.inf
- Install ADCS Feature
- Config of the ADCS step 1
- Create a certificate for the SubCA
- Finish config of the ADCS
- Validate the CRL and CRT locations
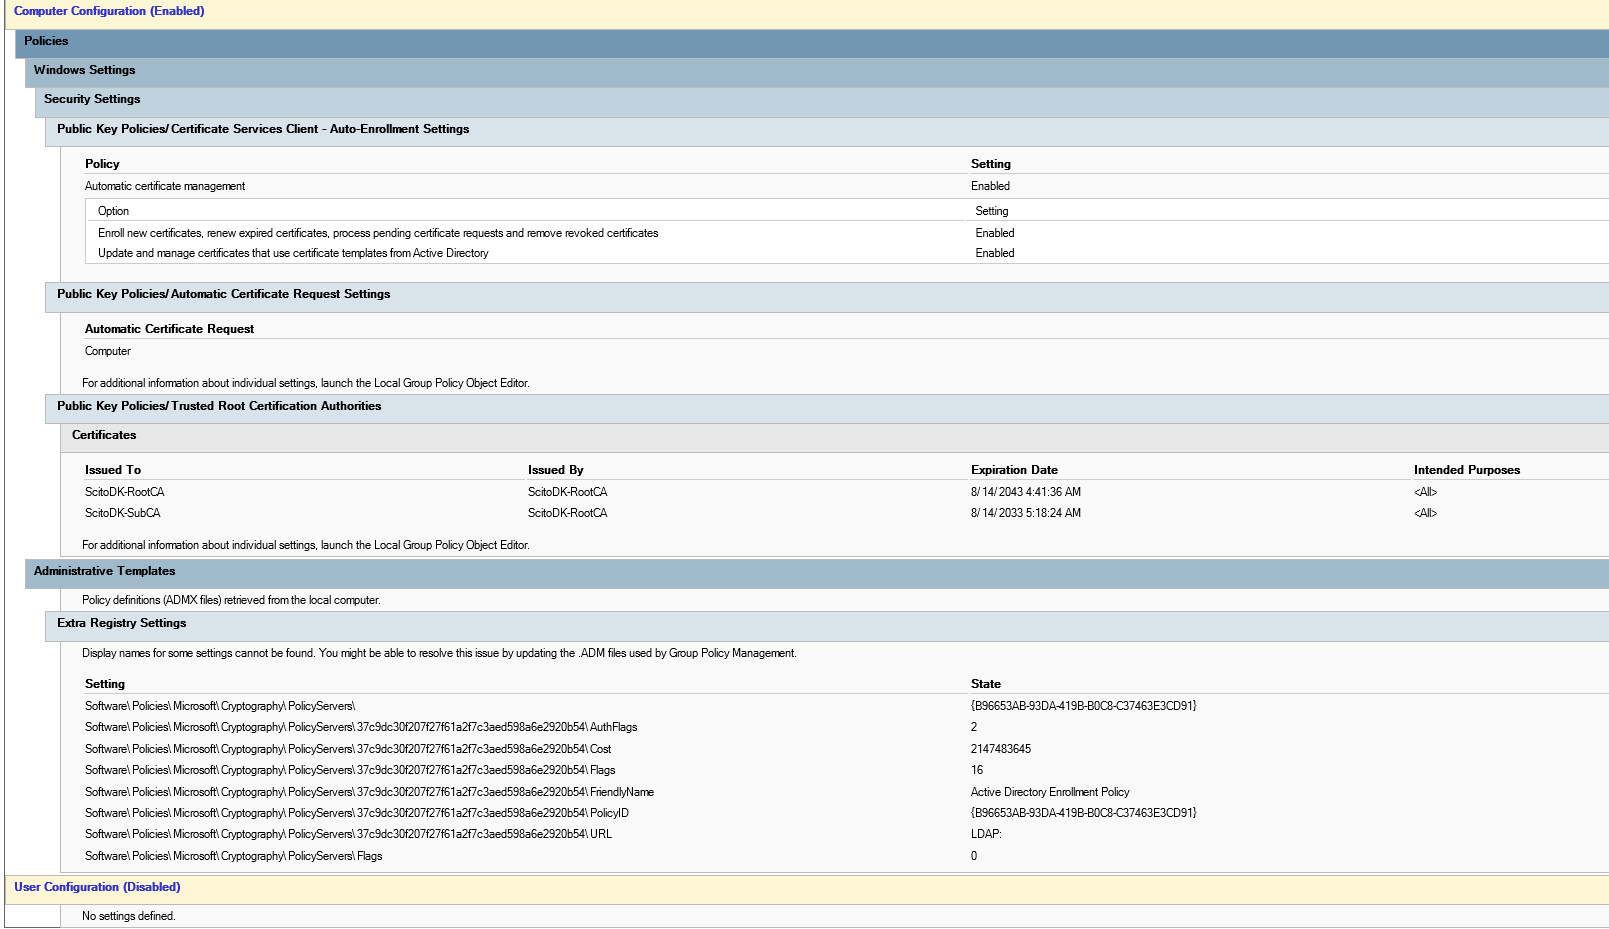
- Create a GPO to trust the Root CA and Sub CA
Step 1
Install a Windows server.
Step 2
Make sure the server is fully updated
Step 3
Create the file C:\Windows\CAPolicy.inf
With the following text. Remember to Change URLs under the following sections
- [InternalPolicy]
- [AuthorityInformationAccess]
- [CRLDistributionPoint]
If there are a specific internal OID being used, then change the OID to the company provided OID under the [InternalPolicy] Section
[Version]
Signature="$Windows NT$"
[PolicyStatementExtension]
Policies=InternalPolicy

[InternalPolicy]
OID= 1.2.3.4.1455.67.90.5
URL=http://Win-Sub-CA01/certs/cps.html

[Certsrv_Server]
RenewalKeyLength=4096
RenewalValidityPeriod=Years
RenewalValidityPeriodUnits=20
CRLPeriod=Years
CRLPeriodUnits=1
CRLDeltaPeriod=Days
CRLDeltaPeriodUnits=0
ClockSkewMinutes=20
LoadDefaultTemplates=True
AlternateSignatureAlgorithm=0
ForceUTF8=0
EnableKeyCounting=0

[AuthorityInformationAccess]
URL=http://Win-Sub-CA01/certs/ScitoDK-SubCA.crt
URL=C:\Windows\System32\CertSrv\CertEnroll\ScitoDK-SubCA.crt

[CRLDistributionPoint]
URL= http://Win-Sub-CA01/certs/ScitoDK-SubCA.crl
URL= C:\Windows\System32\CertSrv\CertEnroll\ScitoDK-SubCA.crl

[PolicyStatementExtension]
Policies = AllIssuancePolicy
Critical = FALSE

[AllIssuancePolicy]
OID = 2.5.29.32.0Code language: PHP (php)
Step 4
Open Powershell and install the Windows Certificate Authority Feature
Add-WindowsFeature Adcs-Cert-Authority -IncludeManagementTools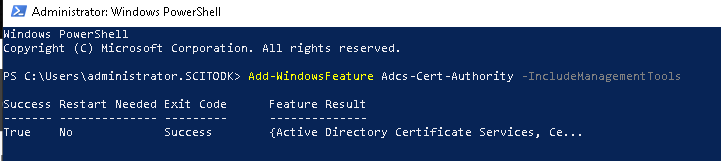
Step 5
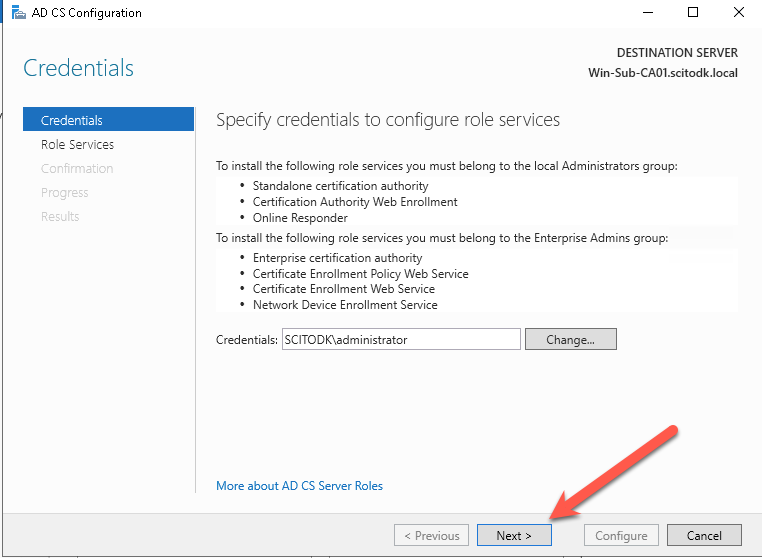
Configure the 1 step of the SubCA
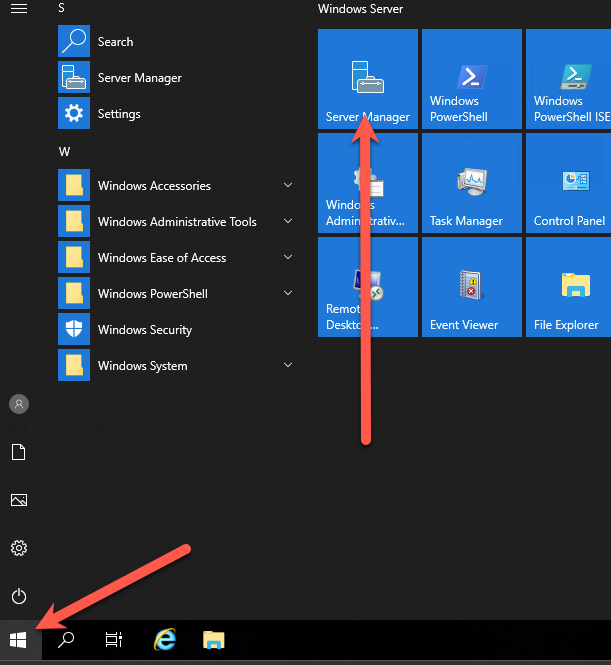
Open Server manager
Click on the notification icon within server manager
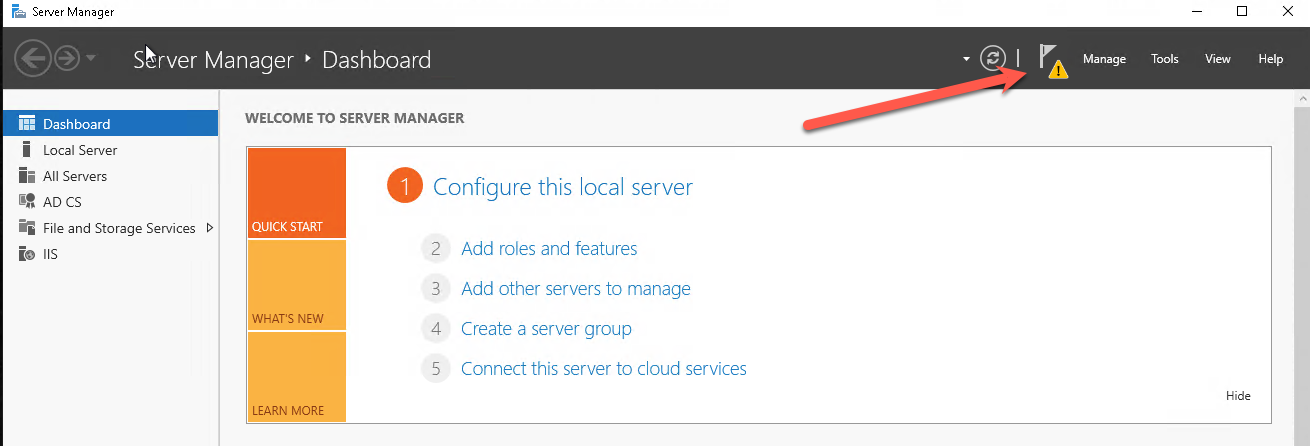
Click the Configure Active Directory Certificate Services on this server

Click the next button
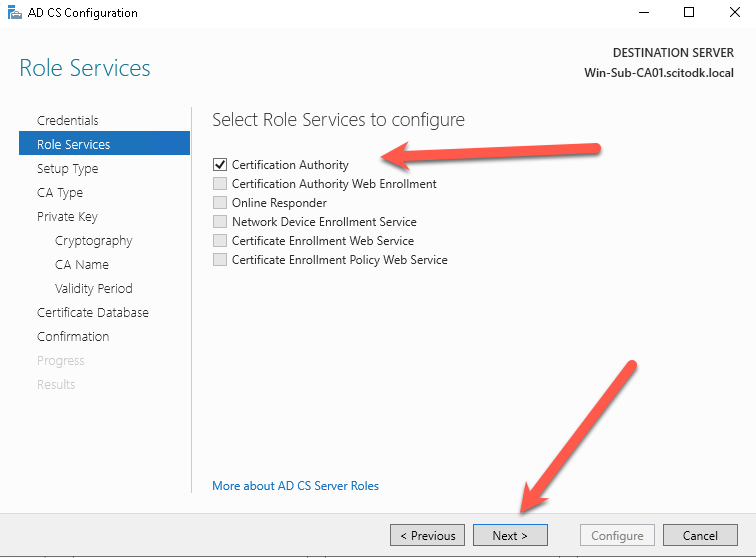
Select Certificate Authority and press the Next button
Select Enterprise CA and press the Next button
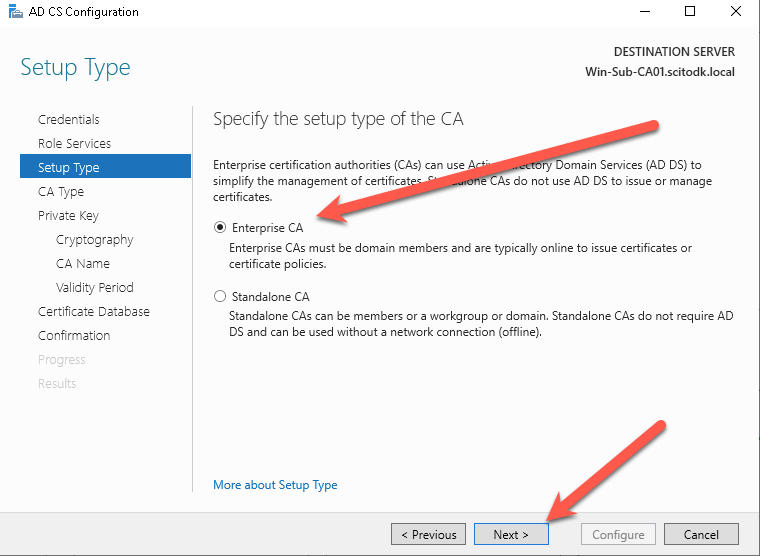
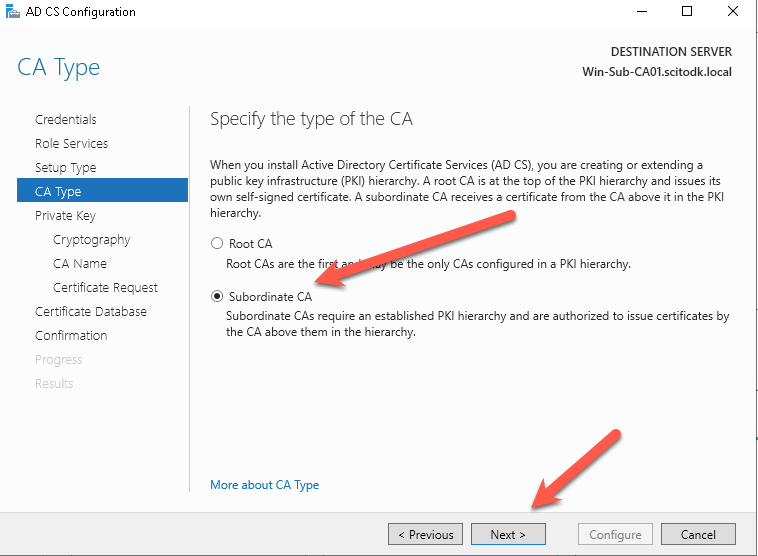
Select Subordinate CA and press the Next button
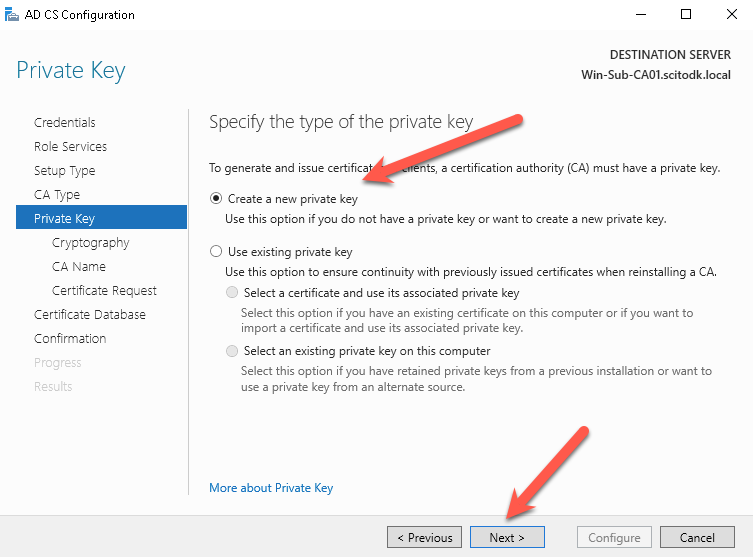
Select Create new private key and press the Next button
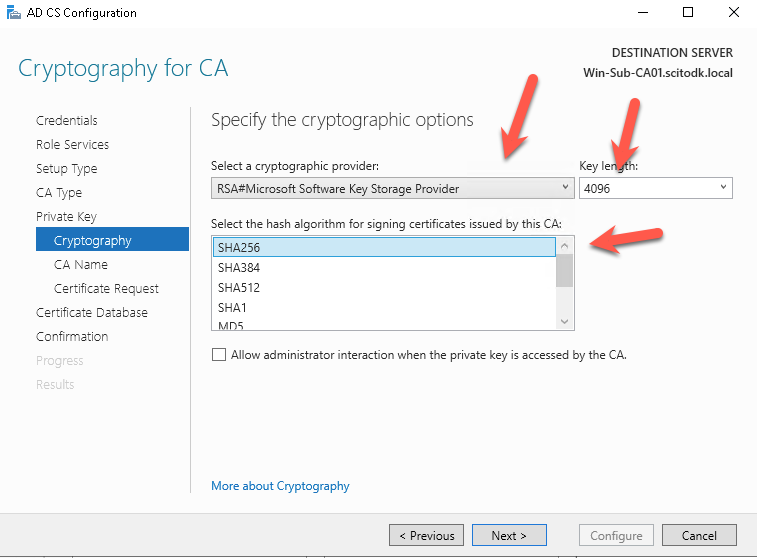
Select RSA#Microsoft Software Key Storage Provider
The Key should be at least 4096 in length and the signing algorithm should be at least SHA256.
Press the next button when ready to continue
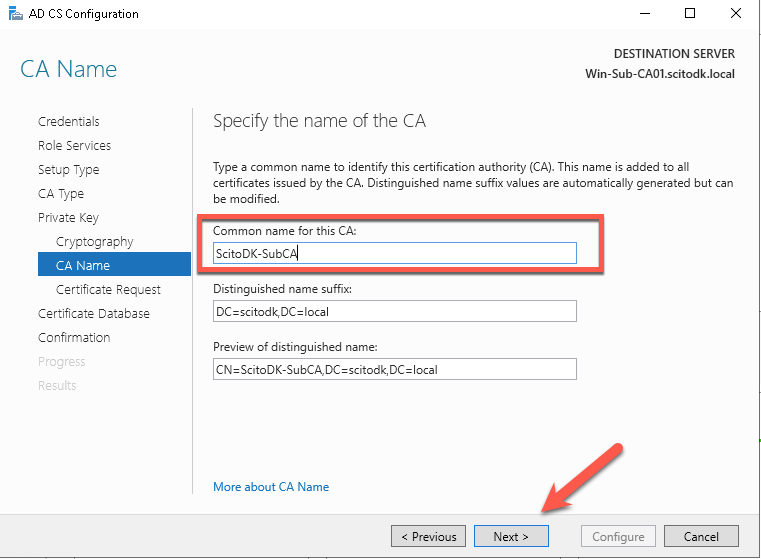
Write the Common name of the Certificate Authority. In this case it is ScitoDK-SubCA and press the Next button
I strongly recommend that this is not the server name. When the ADCS services will be moved at some point the naming will be mismatch and it will hurt any good technician eyes 🙂
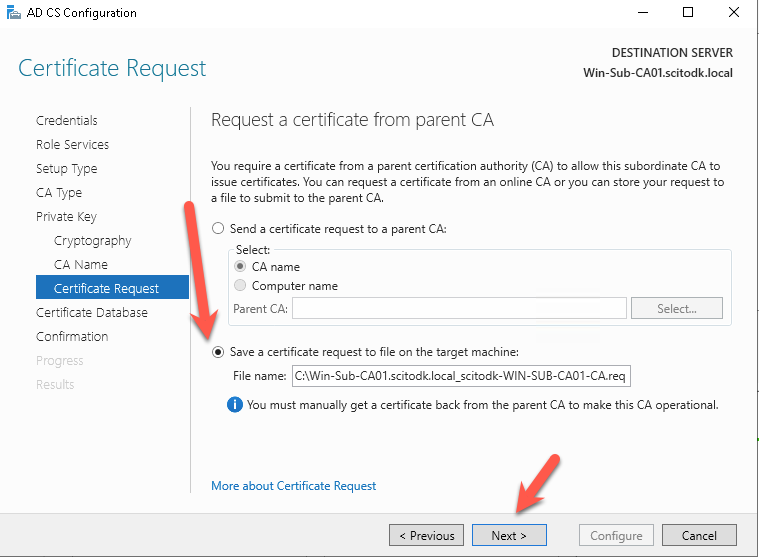
Save the CSR file, so we can get it to the RootCA. Press the Next button
Press the Next button
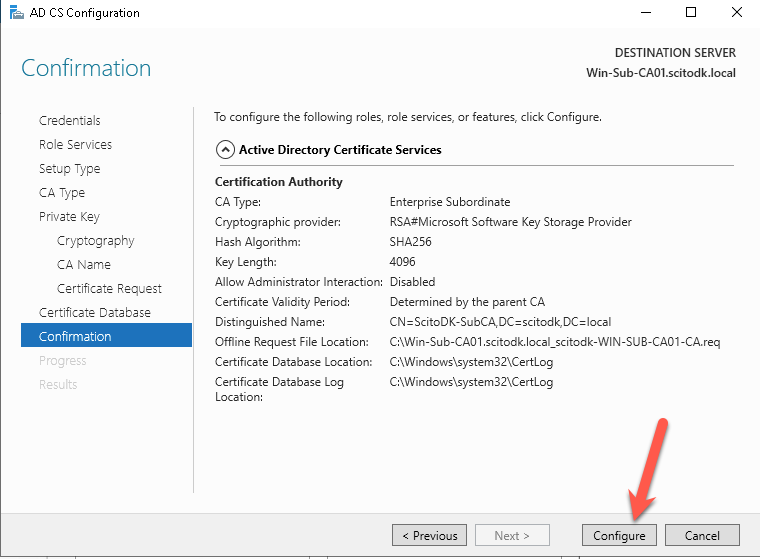
Press the Configure button
When Finished press the close button

Step 6
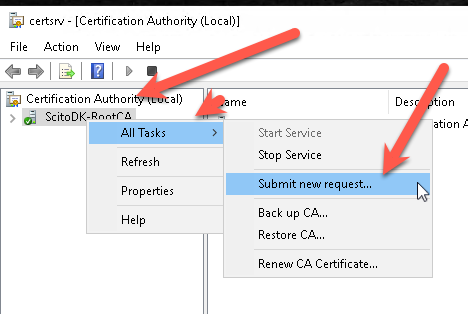
Sign the certificat request on the RootCA.
The following is executed on the RootCA Server
Open Certificate Authority manager
Right-click the CA name, select all tasks and then select subnet new request
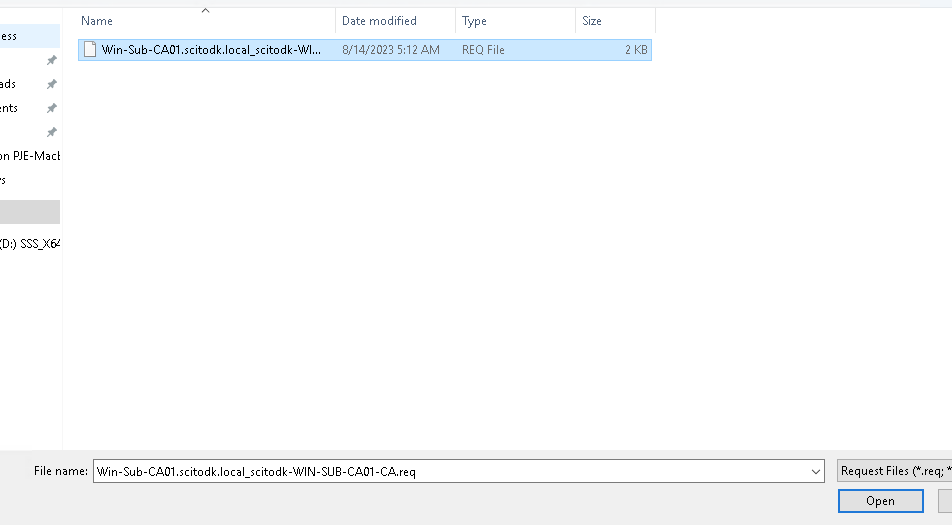
Select the CSR file that the SubCA generated
Select the pending requests, select the certificate, right-click select all tasks and select issue
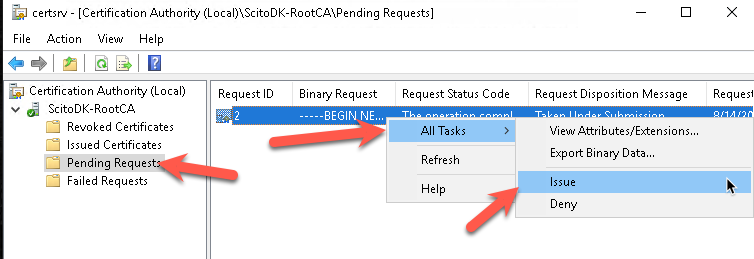
The Certificate is now issued.
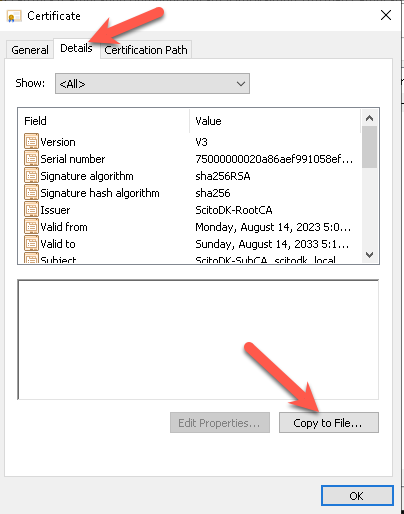
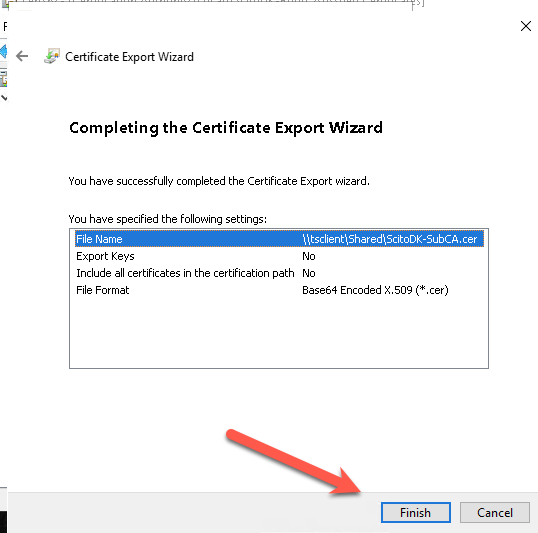
Select the issued certificates, select the certificate. Right-click and select open
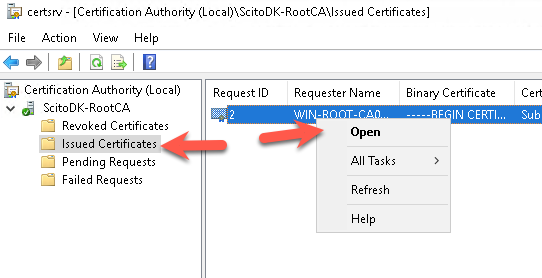
Select the details tab and click the copy to file button
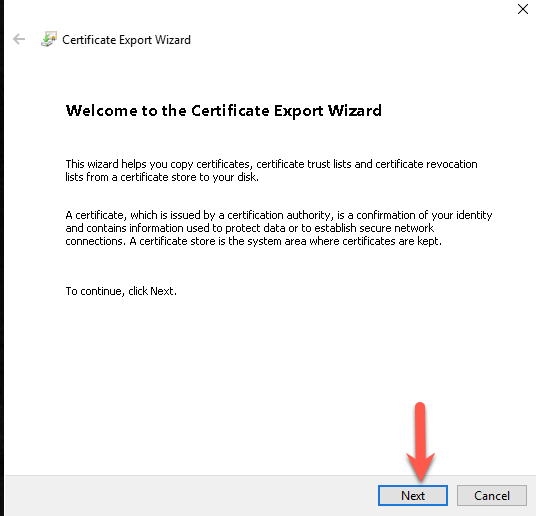
Press next
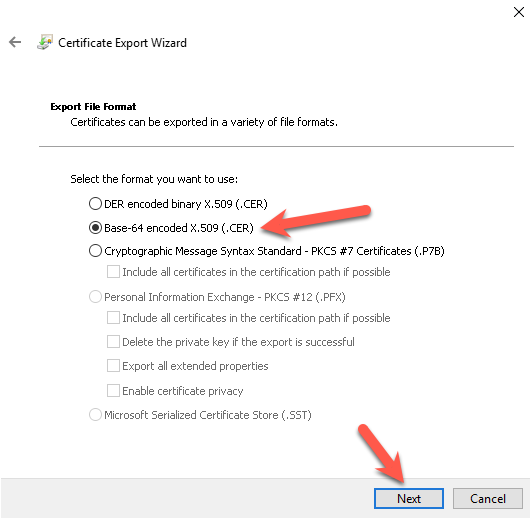
Select Base-64 encoded x.509 (.cer) and press next
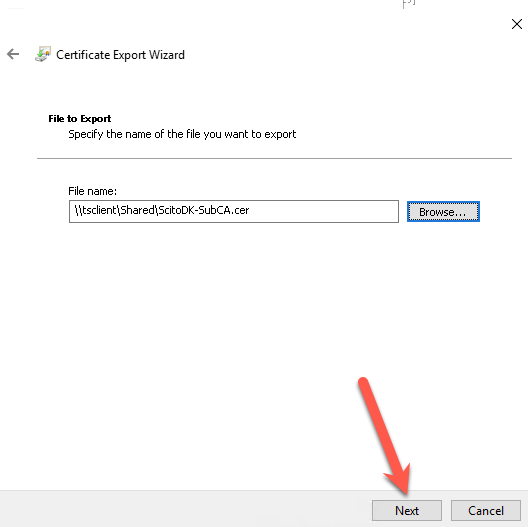
Select the path where the cert should be saved to and press the next button
Press finish
Step 7
Continue the SubCA Configuration
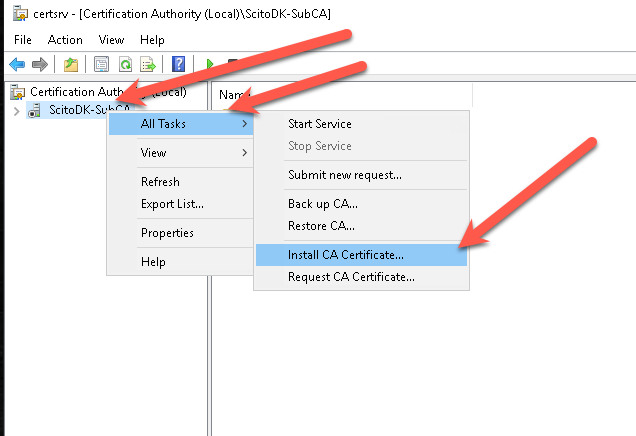
The following is executed on the SubCA Server
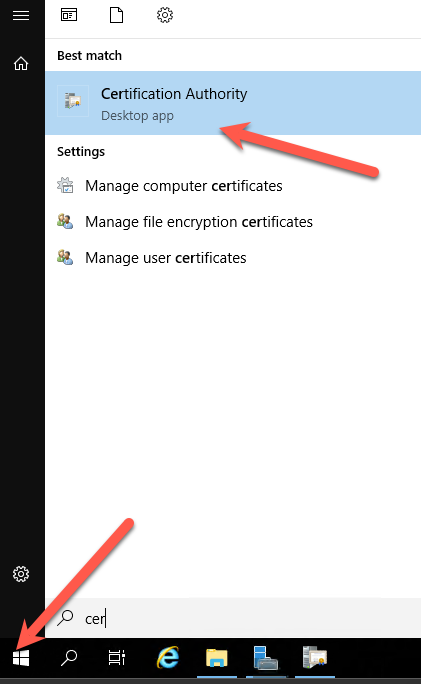
Open the Certificate Authority manager
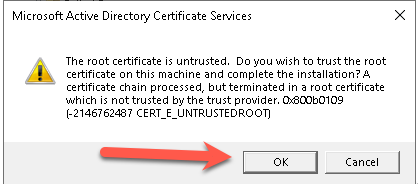
Right-Click the CA name, select all tasks, then select Install CA Certificate
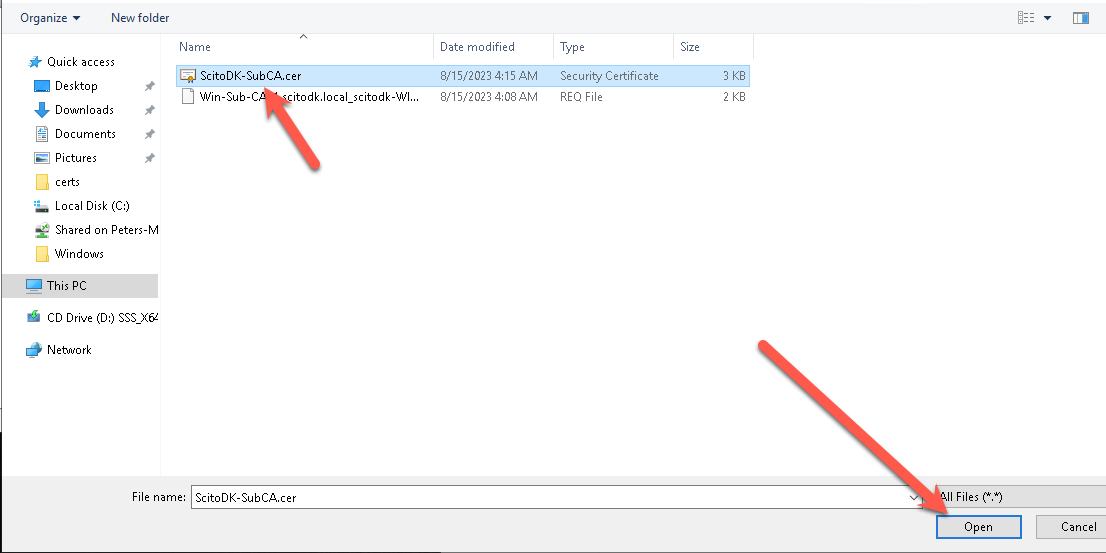
Select the certificate that we got from the RootCA
If it ask after the RootCA or if it should be trusted, press the OK button
Right-click the CA name, select all tasks, then select start service

The service is starting
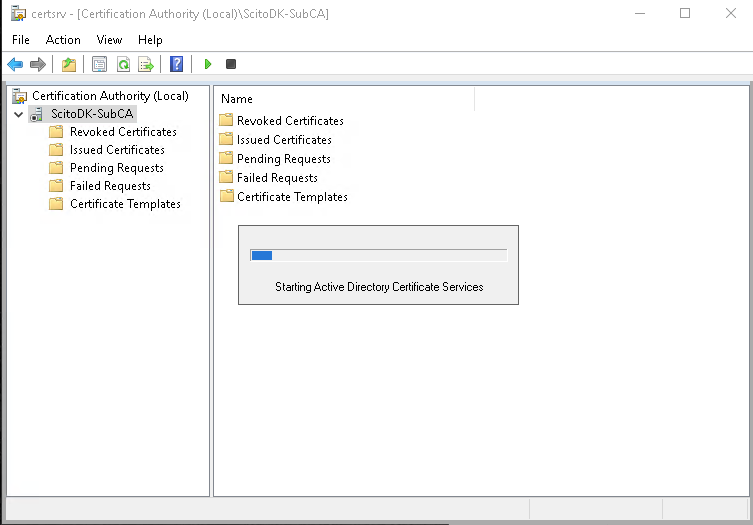
The CA name will have a green icon when running

Open Powershell for additional configuration of the Windows Certificate Authority Feature.
Remember to change the URL for the Add-CACRLDistributionPoint and Add-CAAuthorityInformationAccess
$crllist = Get-CACrlDistributionPoint; foreach ($crl in $crllist) {Remove-CACrlDistributionPoint $crl.uri -Force};
Add-CACRLDistributionPoint -Uri C:\Windows\System32\CertSrv\CertEnroll\ScitoDK-SubCA.crl -PublishToServer -PublishDeltaToServer -Force
Add-CACRLDistributionPoint -Uri http://Win-Sub-CA01/certs/ScitoDK-SubCA.crl -AddToCertificateCDP -AddToFreshestCrl -Force
Get-CAAuthorityInformationAccess | Remove-CAAuthorityInformationAccess -Force
Add-CAAuthorityInformationAccess -AddToCertificateAia http://Win-Sub-CA01/certs/ScitoDK-SubCA.crt -Force
certutil.exe –setreg CA\CRLPeriodUnits 20
certutil.exe –setreg CA\CRLPeriod “Years”
certutil.exe –setreg CA\CRLOverlapPeriodUnits 3
certutil.exe –setreg CA\CRLOverlapPeriod “Weeks”
certutil.exe –setreg CA\ValidityPeriodUnits 10
certutil.exe –setreg CA\ValidityPeriod “Years”
certutil.exe -setreg CA\AuditFilter 127
Restart-Service certsvc
certutil -crlCode language: PHP (php)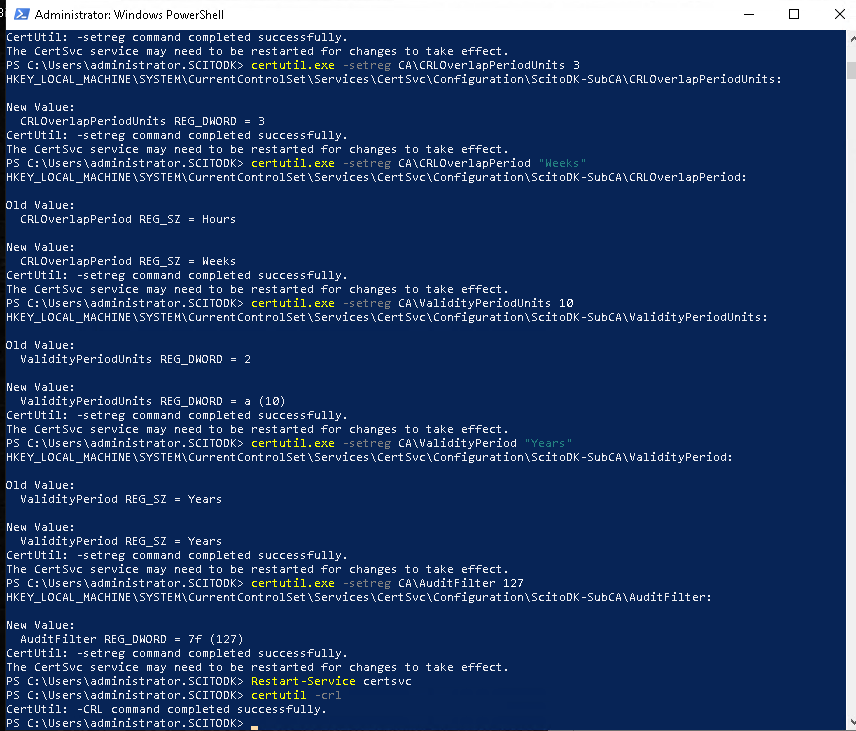
Step 7
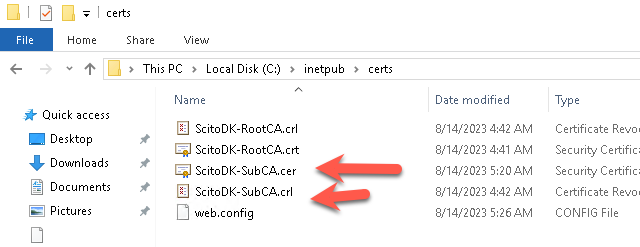
Copy the Root Certificat and the CRL file to the web site where the CRL are stated in the certificate
The files are located in the file directory under C:\Windows\System32\CertSrv\CertEnroll
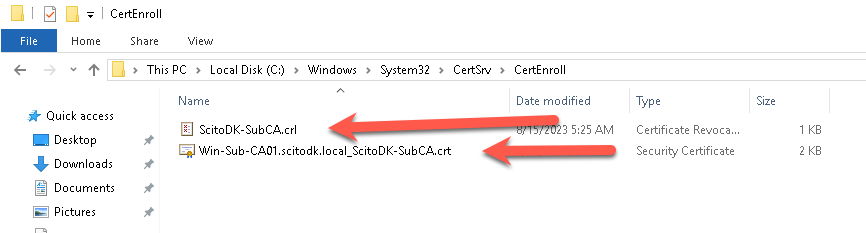
Remember to rename the Certificate file to the correct name stated in the CRL url. In this case it is ScitoDK-SubCA.crt
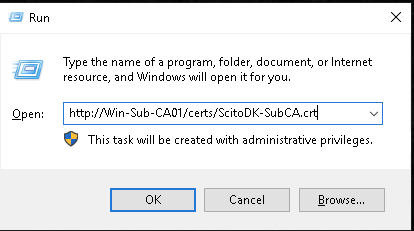
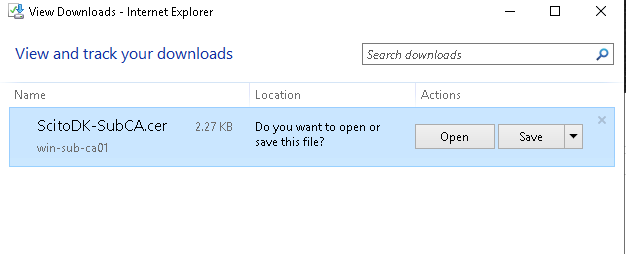
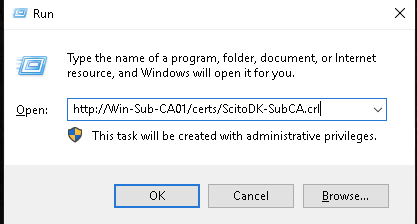
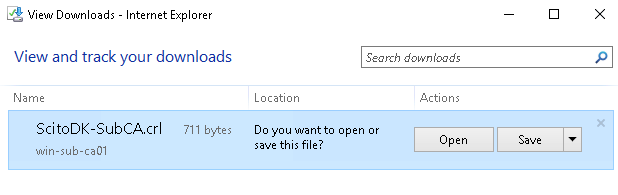
Test if the AIA is working: in this example it is http://Win-Sub-CA01/certs/ScitoDK-SubCA.crt.
Otherwise the clients or Subordinates CA will not work if the check to find the CRL file
Validate the CRL and AIA url:
Step 9
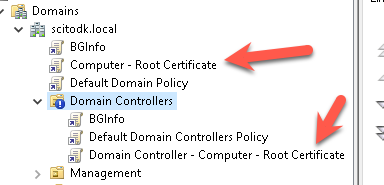
Create a gpo so the servers and workstations trust the root-ca and sub-ca certificate.
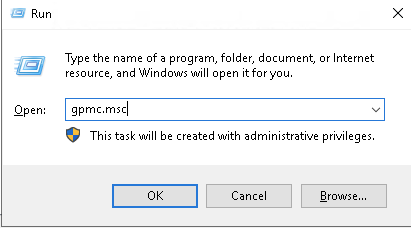
Open run and enter gpmc.msc
Expand the tree and create two new policies.
One for the Domain controllers and one for the other servers and clients.
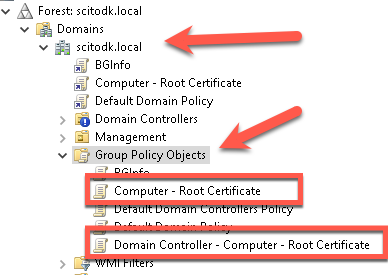
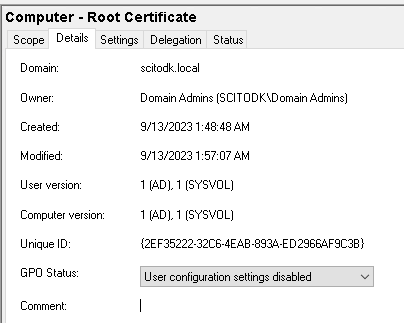
To speed of the GPO Processing then either put these settings in an existing GPO or disable the user settings
Settings for the GPO for Workstations and servers are like this:
Settings for the GPO for the domain controllers are like this
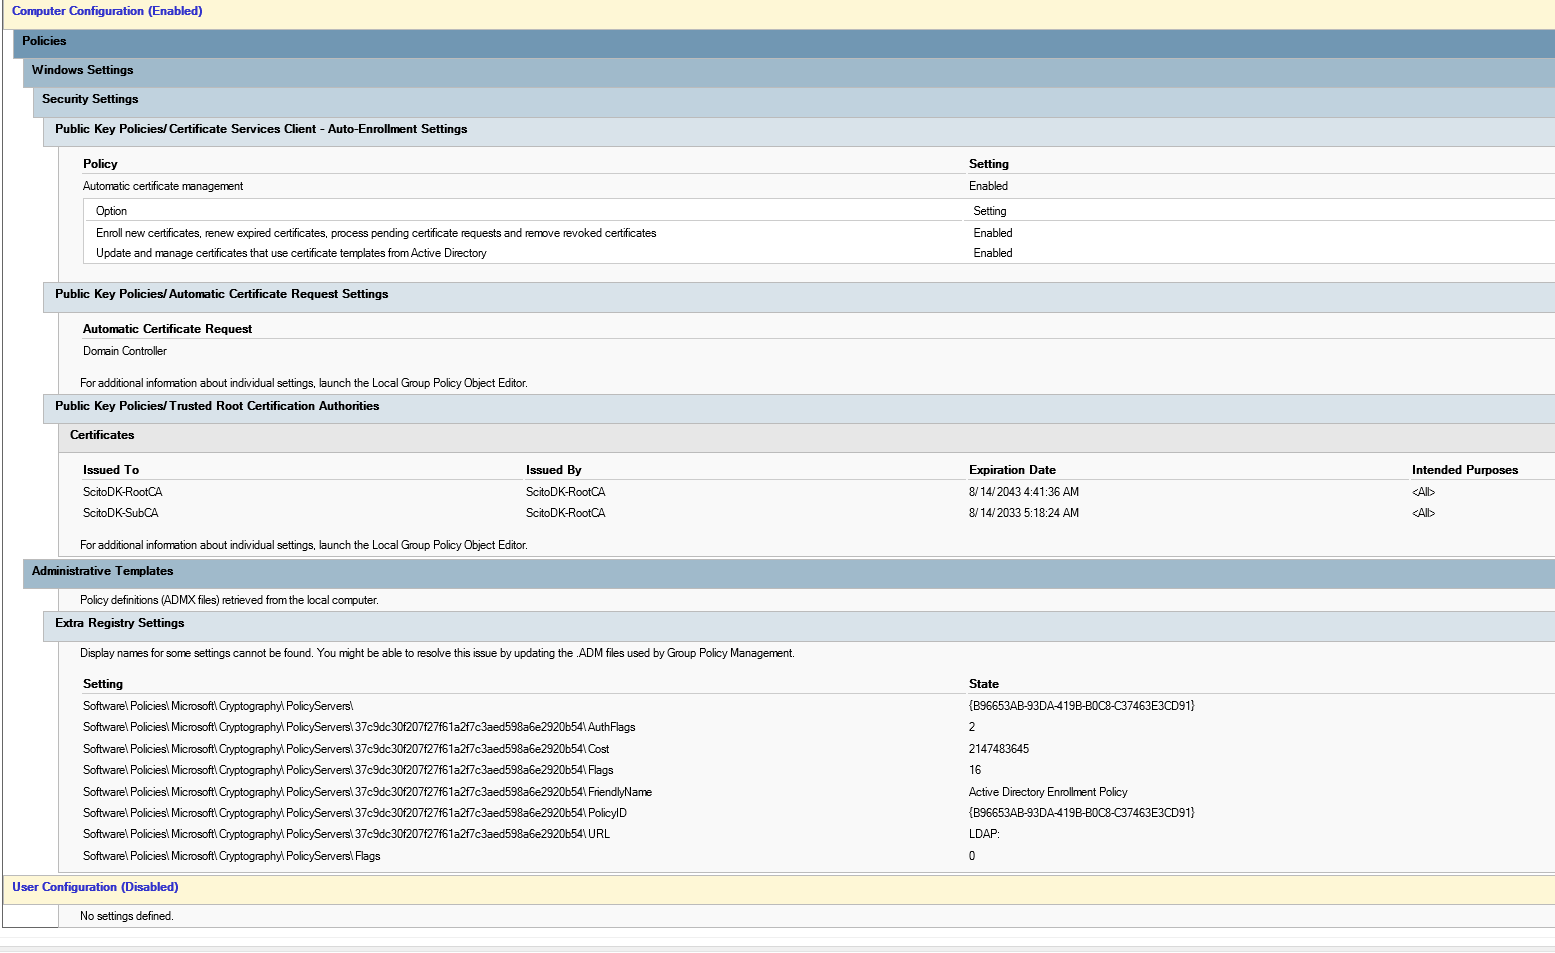
Link the GPOs to the correct OUs.
In my case i have blocked inheritance on the domain controllers ou